Last Updated on: 15th May 2019, 08:31 am
Normally WordPress suppresses most PHP warnings and errors. WordPress debug mode displays error messages that are vital for troubleshooting.
You can find detailed info in the WordPress codex. https://codex.wordpress.org/Debugging_in_WordPress.
Enable WP_DEBUG manually
My preferred method of enabling debug mode is manually via editing the wp-config.php file. Add these lines before /* That's all, stop editing! Happy blogging. */
//START WP_DEBUG

// Enable WP_DEBUG mode
define( 'WP_DEBUG', true );

// Enable Debug logging to the /wp-content/debug.log file
define( 'WP_DEBUG_LOG', true );

// Disable display of errors and warnings
define( 'WP_DEBUG_DISPLAY', false );
@ini_set( 'display_errors', 0 );

//END WP_DEBUG

/* That's all, stop editing! Happy blogging. */
Enable WP_DEBUG with a plugin
You can also use a plugin called simply “debug”. Here is how:
- install https://wordpress.org/plugins/debug/ and check all 5 checkboxes as seen in the first screenshot here: https://wordpress.org/plugins/debug/screenshots/
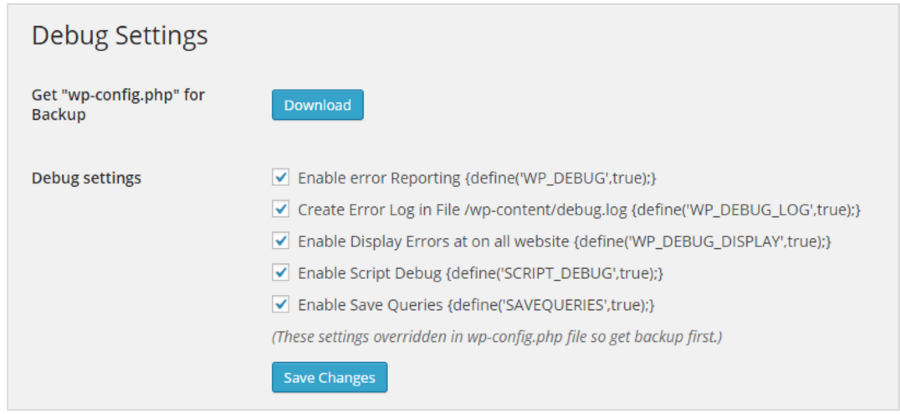
If the plugin fails to edit the files as needed it will give you instructions on how to do this manually. The plugin also allows you to first download your wp-config.php for backup, do it.
Beware though this will make all PHP errors visible and might be to intrusive if your site is live. In that case you can leave out checkbox 3 – “Enable Display Errors”
Review the error log
After this your log file will start filling up, when ever an error or warning occurs. Log files do look a little bleak though and I recommend using WP Log viewer for a better viewing experience when browsing your log file.
If you have trouble finding a specific log file that you think is somewhere hidden in your WordPress installation, use Error Log Viewer. It scans the folders of your installation and makes them viewable / downloadable without having to use FTP.
That is it. Happy troubleshooting.
Leave a Reply